His Name is Truth
Index of all the posts of Gurpartap Singh's Blog
Now we will create a Base machine, Master schema calls this as Base Brick Machine.
This machine will be used to make the SAN machine and the RAC machines. This note can also be used to install Linux on Windows 7 with Virtual machines.
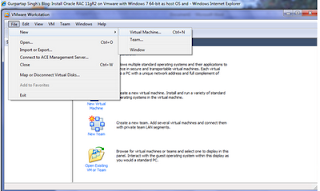
Open Vmware and click file->New->Virtual Machines as follows:
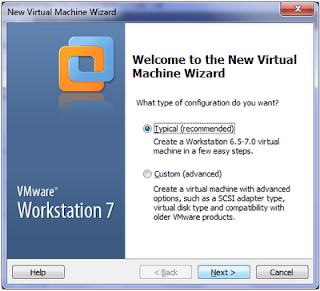
Click Typical
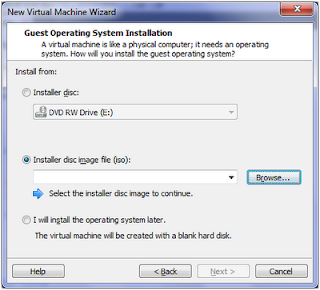
Select installer disk image and browse the location of linux 5.4 64-bit, software in .iso format
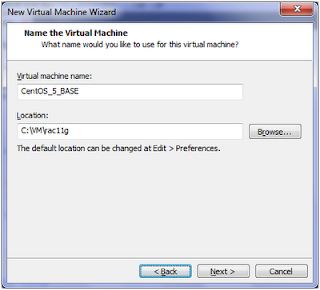
Name hte virtual machine as CentOS_S_BASE
and type the location whereever you want to keep the snapshot. I used "C:\VM\rac11g"
and click next.
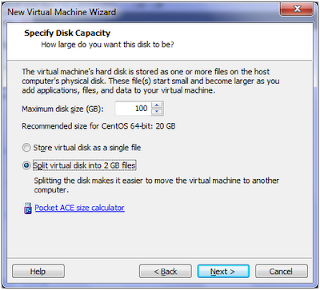
It is just a virtual size. I entered 100GB and also don't forget to click "Split Virtual Disk into 2GB files" and click next.
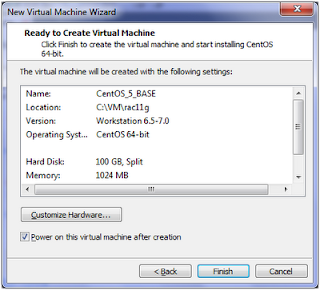
Though the screenshot below has "Power on this virtual Machine after creation" just Uncheck "Power on this virtual machine after creation" as we will do some modifications to this machine (after all its our base machine).
After the machine creation Edit the virtual machine and click on Network adapter and make it Bridged and check "Replicate physical network conversion state" as shown below and keep "Connect at power on" checked and then hit OK.
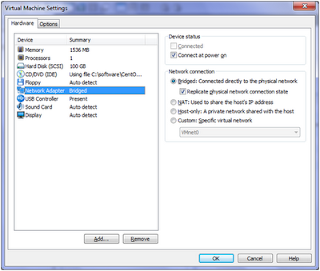
Increase memory to 1536 MB.
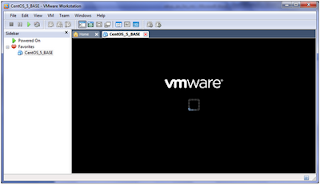
We will install CentOS in graphical mode, so hit enter on the following screen to start instalation in graphical mode.
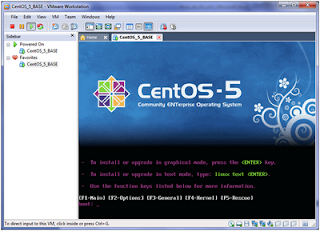
You will see something like in following screen.
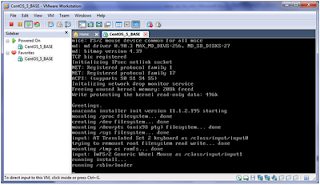
On this screen click skip.
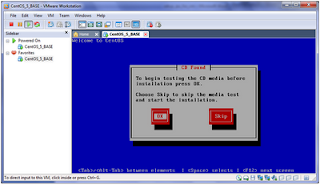
Click next.
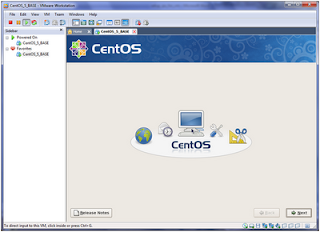
Select English and next.
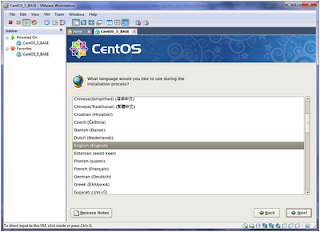
Then, US english and next.
Click yes on warning.
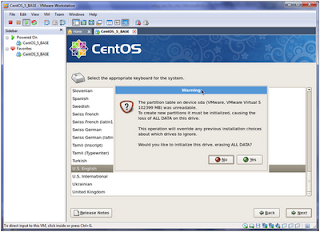
Check "Review and manually partioning layout"
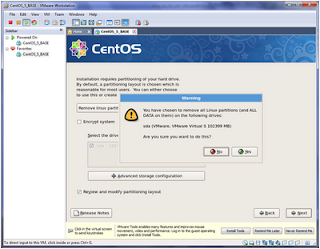
Select /ext3 as shown below and click edit.
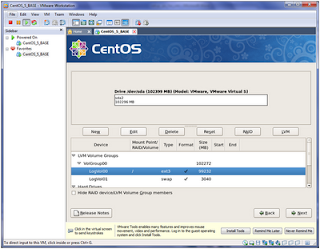
You will see something like this.
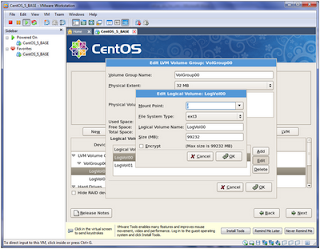
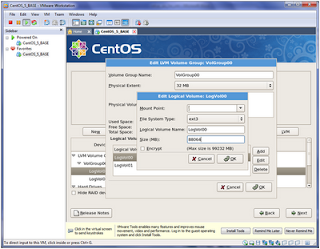
Enter the size of the machine in MB as 88064 Or something that is the multiple of 1024 but less than 90,000 and then click ok.
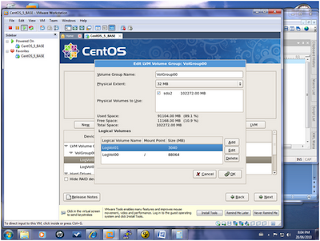
Nowclick on /swap and hit edit as shown below.
Keep the defaults i.e. GRUB and move on.
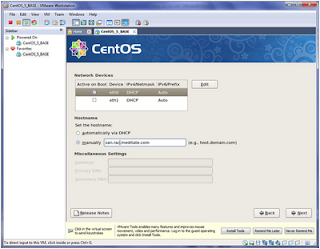
On the following screen enter its ip. My router is set on 192.168.1.x. So, I have used 192.168.1.174 and netmask as 255.255.255.0 and hit ok.
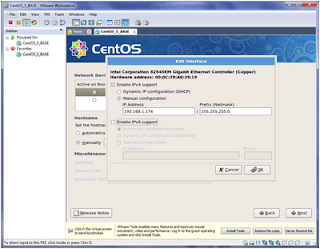
Though we don't need eth1 on this machine but I am using this. Next check eth1 and hit edit.
Enter the ip as 10.10.1.1 and netmask as 255.255.255.0 and hit OK.
Now enter the name of the machine as:
base.rac.meditate.com
(I am picking "meditate" because, "Meditation in rememberance of God is better than medication to cure all diseases in the world")
(I am picking "meditate" because, "Meditation in rememberance of God is better than medication to cure all diseases in the world")
and
Enter the Gateway and Primary DNS as 192.168.1.1 (ip of your router) and hit next.
I selected Vancouver here and uncheck "Synhcronise clock with UTC" and click next.
Enter the password for root.
Uncheck first option Desktop/Genome and start the install.
Install will start and you will see something like this.
next screen during install.
and now reboot
After the reboot finishes you will have something like this, edit firewall configuration
Security level disabled and selinux disabled too.
Then edit system services and uncheck the following list of services.
and now login as root on the following screen.
Now, we are done with Base Machine. you can stop the machime with 'init 0' and make the copy of this machime i.e. copy the whole folder and rename it as SAN. You need to copy folder rac11g. Make two copies of it. Name one copy as base_brick_machine. Other copy as "san". Then delete all the contents under folder rac11g and move folders "base_brick_machine" and "san" under it.
Now, open these machines from vmware workstation console as file -> open -> san -> (file type ("vmware virtual machine configuration") and start the machine. On the pop up that says machine has been copied, just say yes. We are doing this just to make sure the machine comes up fine. Keep adding the machines to favorites. Just right click on the machine on right side of the window in VM workstation console and click "add to favorites". Once machine is up and running just stop it by executing "init 0" as root.
In next part we will make the SAN machine.
Part 1 - Vmware Setup
Part 2 - Setup Base Brick Machine
Part 3 - SAN Setup
Part 4 - RAC VM Setup
Part 5 - Install Grid Infrastructure
Part 6 - Run asmca and Install RDBMS Software
Part 7 - Create RAC database with DBCA
Part 8 - Add node and instance to existing 11gR2 Cluster db
Part 9 - Delete node and inst from existing 11gR2 cluster db
After the reboot finishes you will have something like this, edit firewall configuration
Security level disabled and selinux disabled too.
Then edit system services and uncheck the following list of services.
and now login as root on the following screen.
Now, we are done with Base Machine. you can stop the machime with 'init 0' and make the copy of this machime i.e. copy the whole folder and rename it as SAN. You need to copy folder rac11g. Make two copies of it. Name one copy as base_brick_machine. Other copy as "san". Then delete all the contents under folder rac11g and move folders "base_brick_machine" and "san" under it.
Now, open these machines from vmware workstation console as file -> open -> san -> (file type ("vmware virtual machine configuration") and start the machine. On the pop up that says machine has been copied, just say yes. We are doing this just to make sure the machine comes up fine. Keep adding the machines to favorites. Just right click on the machine on right side of the window in VM workstation console and click "add to favorites". Once machine is up and running just stop it by executing "init 0" as root.
In next part we will make the SAN machine.
Remember:
This world is like a bubble in a water that wells up and disapper, there is nothing that is forever in this Universe the only thing that was, is and will remain true is God Himself, so always remember Him and try to be one with Him.
Part 1 - Vmware Setup
Part 2 - Setup Base Brick Machine
Part 3 - SAN Setup
Part 4 - RAC VM Setup
Part 5 - Install Grid Infrastructure
Part 6 - Run asmca and Install RDBMS Software
Part 7 - Create RAC database with DBCA
Part 8 - Add node and instance to existing 11gR2 Cluster db
Part 9 - Delete node and inst from existing 11gR2 cluster db


Hello Gurpartap Singh Ji, I am installing Centos 5.8 (Part 2). During ips setup, it shows only eth0 (not eth1). Will it be problem in the future? if yes, how to correct it?
ReplyDeleteHello Talwinder Ji,
ReplyDeleteThanks for visiting the blog and then following it.
In the screen shot right after line "Increase memory to 1536 MB." please see the machine has more then 1 network card. You have to add them manually before starting the machine. Yes, to set up RAC we need to have more than one virtual network card or we will have prolems later.
By the grace of all mighty, Good Luck with the setup and have fun with meditation !
Remember to Remember ALL MIGHTY with each passing breath!
Regards,
Gurpartap Singh
Hi Sir,
ReplyDeleteThis is Sandy. We have two things in common , love for meditation and our profession, I am newbie DBA .I need some advices from your end, so it will be great if you can kindly let me know your email so that I can contact you.
God bless you.
Regards,
Sandy
Hello Sandy,
ReplyDeleteThat's great to find more people especially Oracle DBA in love with meditation, hopefully you also have love for meditating in the name of one LORD. This is the only thing for which we all have been awarded this life for. Everything else we do is to be successful in this core goal of life.
From my side there is only one advice "Meditate as much as you can in the name of one Lord" and pray the same for me. Everything else will follow you.
Strange eh ! but is true for me and so advised you as well.
Thanks for visiting my blog.
Have Fun and enjoy every moment of your life to the fullest.
Regards,
Gurpartap Singh
Hello Gurpartap Singh,
ReplyDeleteThis blog is a gift to DBA learners.Thank you so much !
"We will install CentOS in graphical mode, so hit enter on the following screen to start instalation in graphical mode."
I encountered an issue while installing centos 5.8 on VMware. As per the above step CentOS has to pop up a window for asking graphical mode at the time of installation. Instead of that it is installing in text mode.
I tried to change install format to graphical mode by (ctrl+alt+f7), but still no luck.
1)Can you please suggest me which version i can get graphic mode for complete installation.
2)Or suggest me if the installation is completed in text mode, how can we set eth0,eth1 ip address.
Thanks & Regards,
Suresh
Hi Gurpartap Singh,
ReplyDeleteHello Gurpartap Singh Ji, I am installing Centos 5.8 (Part 2). During ips setup, it shows only eth0 (not eth1). Will it be problem in the future? if yes, how to correct it?
In the screen shot right after line "Increase memory to 1536 MB." please see the machine has more then 1 network card. You have to add them manually before starting the machine. Yes, to set up RAC we need to have more than one virtual network card or we will have problems later.
This answer was given to Talwinder ji. Can you kindly clear me how can we add manually. My Laptop is Lenovo - Core I5, win-7, 8GB -RAM, 750 GB HD. Do i need to buy any external network card or can we do it virtually. Please explain me, your suggestions values me a lot. Thank you once again.
Tks $ Rgds,
Suresh
Hello Gurpratap,
ReplyDeleteThis is a very nice blog. I have 1 question, in the section where you have written "edit system services and uncheck the follow list of services" It is not clear which services to stop, could you please let us know which services we have to stop.
Thanks,
Anuj
Nice Blog. But Gurdeep I have struggled a lot while unchecking the services, as it has disabled ssdh and other main services, due to which I was not able to login to the server through putty. Please make it clear so that there would be no struggle for any other post coming candidate.
ReplyDeleteThanks
Deepak
I am facing the same issue that eth1 is not showing ...i guess i have only one network interface card in my machine ...is there anyway of modfying the setting to configure two interfaces in one network interface card..
ReplyDelete